Engineering in Classic WoW offers unique utility, gadgets, and a distinct playstyle, appealing to players seeking inventive solutions and battlefield advantages.
Classic Engineering provides access to powerful tools, from bombs and target dummies to convenient travel aids, enhancing both PvE and PvP experiences.
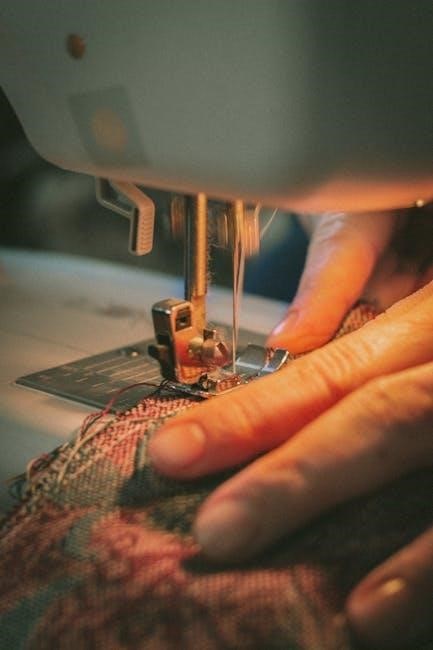
Engineering is a profession focused on crafting, tinkering, and utilizing mechanical devices, offering a diverse range of items for various purposes.
Why Choose Engineering?
Engineering stands out as a profession offering unparalleled utility and a unique gameplay experience in Classic WoW. Unlike professions focused solely on gear, Engineering provides tools that directly impact how you interact with the world and combat. Consider the strategic advantage of deploying bombs in PvP, creating distractions, or utilizing gadgets for swift escapes.
Engineering isn’t just about combat; it’s about convenience. From Goblin Rocket Boots for rapid travel to target dummies for raid preparation, the profession enhances quality of life. The Gnomish Battle Chicken, a classic example, provides amusement and a surprising tactical edge.
Furthermore, Engineering can be a lucrative profession. Crafted items, particularly consumables like bombs and grenades, are consistently in demand, offering opportunities for gold making. The ability to self-sufficiency in creating useful items makes Engineering a valuable asset for any adventurer.
Engineering Specializations in Classic
Classic WoW Engineering doesn’t feature the formalized specializations seen in later expansions, but players naturally gravitate towards focusing on specific crafting branches. These can be broadly categorized based on the types of items crafted and the playstyle they support.
Explosives Engineering centers around bombs, grenades, and demolition devices, ideal for PvP and disrupting enemy formations. This path requires a significant investment in materials like gunpowder and blasting powder.
Gadget Engineering focuses on utility items like Goblin Rocket Boots, grappling hooks, and mechanical pets. This specialization caters to players who value mobility and convenience.
Support Engineering emphasizes items beneficial to raid groups, such as target dummies and various consumables. While less flashy, this branch provides valuable assistance to fellow adventurers. Choosing a focus depends on your preferred playstyle and goals within the game.
Leveling Engineering 1-60
Leveling Engineering from 1 to 60 involves visiting trainers, gathering materials, and crafting progressively complex items, demanding dedication and resourcefulness from players.
Finding Engineering Trainers (Alliance)
Alliance players seeking to learn or advance their Engineering skills can find trainers in several key locations throughout the Classic WoW world. Starting in major cities, Ironforge is a primary hub, offering trainers from levels 1 to 50. Specifically, look for Master Engineer Bolin Ryllstone within the city’s Engineering Guild.
As you progress, Booty Bay on Stranglethorn Isle provides access to trainers up to skill level 60, with Gazlowe being a notable instructor. For those venturing into Outland, Shattrath City becomes the go-to destination, housing trainers capable of taking your Engineering expertise even further. Remember to check the trainer’s skill level requirements before traveling, ensuring you meet the necessary prerequisites to learn new recipes and advance your profession. Utilizing online resources and profession guides can also streamline the process of locating the most convenient trainer for your current level.
Finding Engineering Trainers (Horde)
Horde players embarking on their Engineering journey will discover trainers strategically positioned across the Classic WoW landscape. Orgrimmar serves as the initial training ground, with instructors available up to skill level 50. Seek out Master Engineer Gronok within the Valley of Strength to begin or continue your training.
Progressing further, Gadgetzan in Tanaris offers trainers capable of elevating your skills to 60, providing access to more advanced recipes and gadgets. When the time comes to explore Outland, Shattrath City becomes the central location for Horde Engineering training, offering expertise beyond the original level cap. Always verify the trainer’s skill level requirements to ensure compatibility with your current profession level. Online guides and community forums can also assist in pinpointing the most efficient trainer locations, saving valuable travel time and effort.
Essential Materials for Early Leveling
Early Engineering leveling in Classic WoW demands a consistent supply of basic materials. Copper Ore and Bronze Bars form the foundation for many initial recipes, readily obtainable through mining or the Auction House. Iron Ore and subsequently Iron Bars become crucial as you progress, requiring more dedicated mining efforts or careful purchasing.
Leather, particularly Light Leather, is frequently used in crafting early gadgets. Small Cogs and Springs are essential components, often created from salvaged materials or purchased from vendors. Don’t underestimate the importance of Linen Cloth, a common requirement for various recipes. Efficiently gathering these materials, or strategically utilizing the Auction House, will significantly accelerate your leveling process and minimize frustrating resource bottlenecks. Stockpiling these essentials will prove invaluable as you advance through the skill ranks.

Leveling 1-50: Basic Components
Levels 1-50 in Classic Engineering focus on mastering fundamental crafting skills and producing essential components. Prioritize recipes for Bronze Bombs, Iron Grenades, and basic repair items like Iron Rivets. These provide consistent experience and are useful for personal use or Auction House sales.
Crafting Gnomish Devise and similar early gadgets offers a steady stream of skill-ups. Focus on recipes requiring readily available materials like Copper, Iron, and Linen. Don’t neglect the creation of Small Cogs and Springs, as these are used in numerous subsequent recipes. Efficiently utilizing trainers and consistently crafting will quickly advance your skill level, preparing you for the more advanced recipes available at higher levels. Remember to check the Auction House for material bargains!
Leveling 50-60: Advanced Gadgets
Levels 50-60 unlock Engineering’s most iconic and powerful creations. Focus on recipes requiring Mithril, Thorium, and Arcanite. Mastering Demolish Wand crafting is crucial, as it’s a valuable item for both leveling and end-game content. Simultaneously, begin producing Goblin Rocket Boots – a highly sought-after mobility item.
Gnomish Battle Chicken crafting provides significant skill-ups and a fun, albeit quirky, item for players. Prioritize recipes that utilize materials efficiently, minimizing costs while maximizing experience gains. Don’t overlook the value of crafting Thorium Bombs and Grenades, as these are essential for PvP and raid encounters. Consistent crafting and strategic material acquisition will ensure a smooth progression to Engineering skill 60.
Key Engineering Recipes & Items
Engineering boasts iconic items like the Gnomish Battle Chicken, Goblin Rocket Boots, and the potent Demolish Wand, offering unique utility and advantages.
Gnomish Battle Chicken (and its uses)
The Gnomish Battle Chicken is arguably the most famous Engineering creation in Classic WoW, a delightfully absurd and surprisingly effective item. Crafted at Engineering skill 225, this mechanical poultry isn’t a powerhouse of damage, but its chaotic nature makes it a memorable addition to any player’s arsenal.
Upon activation, the chicken explodes after a short duration, dealing moderate fire damage to nearby enemies. However, its primary use isn’t raw damage output. The chicken’s unpredictable movement and explosive finale can disrupt enemy formations, interrupt spellcasting, and generally cause confusion on the battlefield.
In PvP, it’s a fantastic distraction, forcing opponents to react to a flapping, clucking, and ultimately exploding bird. It’s also a source of amusement, often leading to memorable moments. While not a core raiding item, the Gnomish Battle Chicken embodies the whimsical spirit of Engineering and remains a beloved classic.
Goblin Rocket Boots
Goblin Rocket Boots, crafted at Engineering skill 275, represent a significant leap in player mobility in Classic WoW. These boots provide a short burst of incredibly fast movement speed, allowing players to quickly traverse distances or escape dangerous situations. However, their use comes with a caveat: a somewhat unpredictable landing.
Upon activation, the boots propel the player upwards and forwards, covering a substantial distance. The landing, however, is often uncontrolled, potentially resulting in a fall or collision with the environment. Skillful players learn to mitigate this by activating the boots near terrain they can safely land on.
In PvP, Rocket Boots are invaluable for initiating engagements, disengaging from combat, or quickly reaching objectives. They are also useful for navigating large zones efficiently. While requiring practice to master, Goblin Rocket Boots are a staple Engineering item for any player valuing speed and maneuverability.
Demolish Wand
The Demolish Wand, a coveted Engineering creation requiring skill 260, is a potent weapon specializing in structure damage. Unlike typical player-versus-player combat, this wand excels at rapidly dismantling buildings, fortifications, and even player-constructed structures within the game world. Its unique functionality makes it highly sought after during siege scenarios and world PvP events.
The wand fires a concentrated beam that deals massive damage to non-player-controlled structures. While its effectiveness against creatures and players is limited, its ability to quickly breach defenses is unparalleled. This makes it a crucial asset for guilds engaging in territorial control or attempting to conquer enemy bases.
Acquiring the Demolish Wand requires significant investment in Engineering skill and materials, but its strategic value often outweighs the cost. It’s a testament to Engineering’s capacity for specialized, impactful creations.

Engineering in Raids & PvP
Engineering provides crucial raid utility with target dummies and helpful gadgets, while PvP benefits from bombs, grenades, and unique devices for tactical advantages.
Bombs and Grenades
Engineering’s explosive arsenal, encompassing bombs and grenades, remains a cornerstone of both PvP and, to a lesser extent, raid utility in Classic WoW. These devices offer potent area-of-effect damage and disruptive capabilities, making them invaluable for controlling battlefields and hindering enemy movements.
Classic Engineering provides a variety of explosive options, including Demolish Orbs, which inflict significant damage, and Flash Bombs, designed to disorient opponents. Skillful deployment of these explosives can turn the tide of a PvP encounter or provide a crucial advantage in a raid situation.
Strategic placement and timing are key to maximizing the effectiveness of bombs and grenades. Understanding enemy positioning and anticipating their movements allows engineers to deliver devastating blows and disrupt coordinated attacks. Mastering these tools requires practice and a keen understanding of battlefield dynamics.
Target Dummies
Engineering’s Target Dummies are a unique and invaluable asset, primarily utilized within raid environments to test damage output and refine rotation strategies. These stationary constructs provide a safe and consistent means for players to gauge their performance without risking unintended consequences on actual raid bosses.
Classic Engineering offers various iterations of Target Dummies, each with differing health pools and resistances, allowing for comprehensive testing scenarios. Raiders can utilize these dummies to optimize their gear, refine their talent builds, and ensure they are maximizing their damage potential before engaging in challenging encounters.
Beyond raid testing, Target Dummies can also serve as a convenient training tool for new players learning class mechanics or practicing specific rotations. Their consistent nature provides a reliable benchmark for improvement and fosters a deeper understanding of individual class capabilities.

Engineering Utility Items for PvP
Engineering provides a diverse arsenal of utility items that can significantly impact PvP encounters, offering tactical advantages and disruptive capabilities. These gadgets range from movement-enhancing devices to area-denial tools, allowing skilled engineers to control the battlefield and outmaneuver their opponents.
Classic Engineering’s PvP toolkit includes items like Goblin Jumper Cables, enabling quick resurrections of fallen allies, and various bombs and grenades for area-of-effect damage and crowd control. These items can turn the tide of battle, providing crucial support or disrupting enemy formations.
Strategic deployment of engineering utilities is key to success in PvP. Knowing when to use a Goblin Shield to absorb incoming damage or deploy a Flashbang to disorient enemies can be the difference between victory and defeat. Mastering these tools requires practice and a deep understanding of PvP dynamics.
Outland Engineering (Burning Crusade Classic)
Burning Crusade Classic expands Engineering with new trainers, recipes, and materials, introducing advanced gadgets and powerful enhancements for both PvE and PvP content.
Outland Engineering focuses on utilizing the new resources and technologies available in the expansion, offering unique opportunities for crafting and innovation.
Engineers can now create items tailored to the challenges of Outland, further solidifying their role as versatile and resourceful adventurers.
New Trainers and Recipes
Outland Engineering introduces a fresh wave of trainers scattered across Terokkar Forest, Nagrand, and Shadowmoon Valley, ready to impart their knowledge of advanced mechanical arts. Players will need to seek them out to unlock the new recipes.
These recipes encompass a wide array of items, including powerful explosives like the Felblaster Repeater, utility gadgets such as the Wormhole Generator for convenient teleportation, and enhancements for existing Engineering creations. Mastering these new recipes is crucial for staying competitive.
Notable trainers include Gazlowe in Shattrath City, offering a broad range of Outland Engineering skills, and various specialized trainers found in the outlying zones. Players should prioritize visiting these trainers to maximize their Engineering potential. The recipes themselves often require materials unique to Outland, encouraging exploration and resource gathering.
Furthermore, the introduction of new specializations allows Engineers to focus on specific areas of expertise, unlocking even more specialized recipes and benefits. This specialization system adds depth and customization to the profession.
Required Materials for Outland Engineering
Outland Engineering demands a shift in material focus, moving beyond the ores and metals of Classic Azeroth. Players will now heavily rely on resources found within the new zones, necessitating extensive farming or shrewd market purchases.
Key materials include Fel Iron Ore, Nether Iron Ore, and Adamantite Ore, all essential for crafting advanced gadgets and components. Additionally, Primal Air, Primal Earth, Primal Fire, and Primal Water are frequently required, obtained from elemental creatures throughout Outland.
Arcane Dust, Netherweave Cloth, and various gemstones also become crucial ingredients. Efficiently gathering these materials is paramount, as Outland Engineering recipes often consume significant quantities. Players should consider utilizing Mining and Herbalism skills alongside Engineering to reduce costs.
Finally, specialized components like Crystallized Nether, and various salvaged parts from defeated enemies, are frequently needed for specific recipes, adding another layer of complexity to material acquisition.

Maximizing Engineering Profits
Engineering profits thrive on market demand for gadgets, consumables, and specialized items; efficient material farming and strategic selling are crucial for success.
Crafting sought-after items, like bombs or scopes, and actively monitoring auction house trends will maximize your gold income as a skilled engineer.
Selling Crafted Items
Maximizing profits from Engineering requires a keen understanding of the auction house and player needs. Consistently monitor which items are in high demand – often consumables like bombs and grenades, or utility items like Goblin Rocket Boots – and adjust your crafting accordingly.
Strategic pricing is essential. Don’t undercut the market drastically, as this devalues the item for everyone. Instead, aim for a competitive price that allows for a reasonable profit margin. Consider listing items during peak player activity times to increase visibility.
Bundling items can also be effective. Selling stacks of grenades or multiple components together can attract buyers looking for convenience. Furthermore, actively advertise your crafted goods in trade chat, highlighting their benefits and competitive pricing. Remember, consistent quality and reliable availability will build a loyal customer base.

Utilize auction house addons to track price fluctuations and identify profitable opportunities. Regularly update your listings and adapt to changing market conditions to ensure consistent sales and maximize your Engineering income.
Farming Materials Efficiently
Efficient material gathering is crucial for profitable Engineering. Focus on farming locations known for high yields of essential ores like Iron, Mithril, and Thorium. Utilize mining routes optimized for speed and resource density, and consider using tracking addons to locate nodes quickly.
Skinning beasts that drop leathers and hides is also valuable, as these are frequently used in Engineering recipes. Prioritize areas with a high concentration of skinnable creatures. Furthermore, explore opportunities to farm cloth from humanoids, as bolts of cloth are often required.

Consider utilizing alts specifically for material gathering. This allows you to maximize your farming efficiency and diversify your resource income. Remember to check the auction house prices before farming, to ensure the materials are profitable to acquire.
Efficient inventory management is key. Utilize larger bags and consider banking frequently to avoid wasting time. Finally, explore opportunities to purchase materials in bulk during market dips, securing lower prices for future crafting.

Resources and Guides
Icy Veins and WoW-Professions offer comprehensive guides, while Project Ascension Wiki details trainer locations and leveling. Reddit’s r/classicwow provides community insights.
WoW Forums host discussions and troubleshooting, and Fandom provides detailed profession guides for efficient leveling and crafting strategies.
Useful Websites and Forums

Navigating the wealth of information available for Classic WoW Engineering can be daunting, but several online resources stand out as particularly helpful. Icy Veins (https://www.icy-veins.com/) consistently provides well-structured, in-depth guides covering all aspects of the profession, from leveling to optimal builds.
WoW-Professions (https://www.wow-professions.com/) is another excellent source, offering detailed leveling paths and shopping lists to streamline your progress. For a more community-driven approach, the r/classicwow subreddit (https://www.reddit.com/r/classicwow/) is invaluable. Here, you can find player-created spreadsheets, ask questions, and share experiences.
The World of Warcraft Forums (https://us.forums.blizzard.com/en/wow/) dedicated to Professions are a good place to seek help with specific issues or find information on trainer locations, as highlighted by discussions regarding Classic Engineering trainers. Finally, Project Ascension Wiki (https://projectascension.fandom.com/) provides a detailed wiki specifically for Project Ascension, including trainer locations and material requirements.