Seam guides are invaluable tools for achieving consistent, professional-looking seams, especially for beginners! They ensure uniform stitch placement and aid in maintaining accurate seam allowances.
Whether magnetic, adhesive, or engraved, these guides simplify sewing, promoting straight stitches and building sewing confidence, as seen with options like Dritz and Everything Mary.
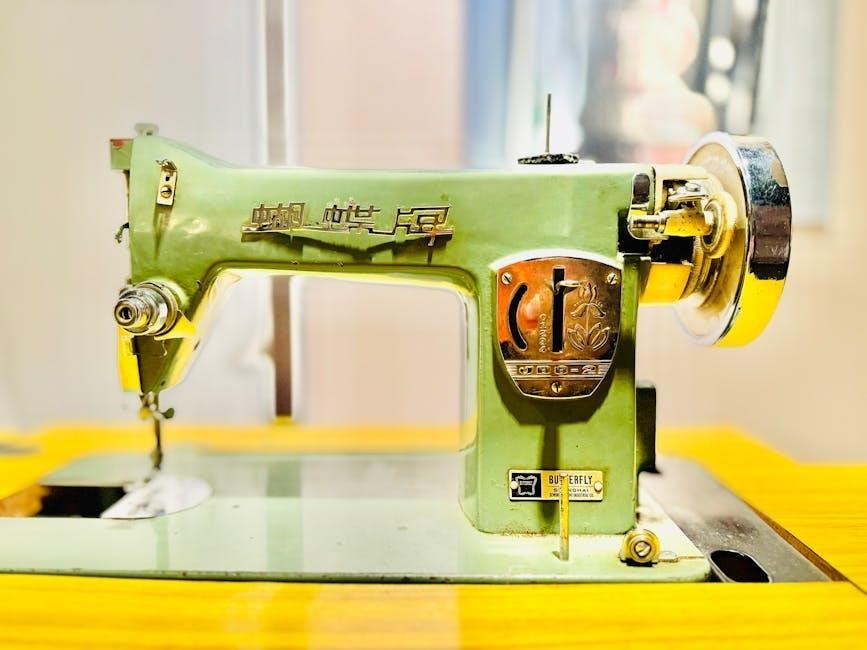
What is a Seam Guide?
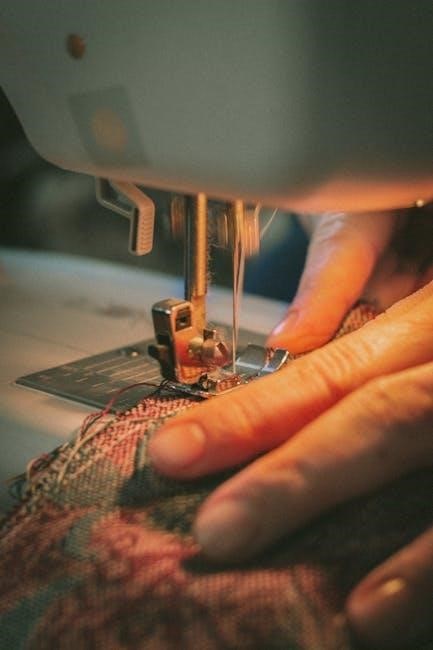
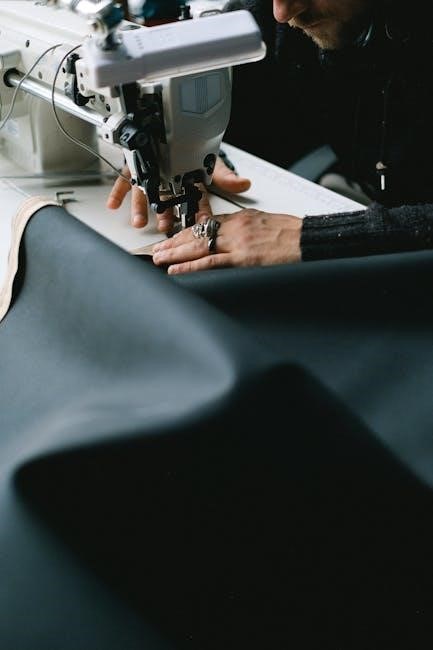
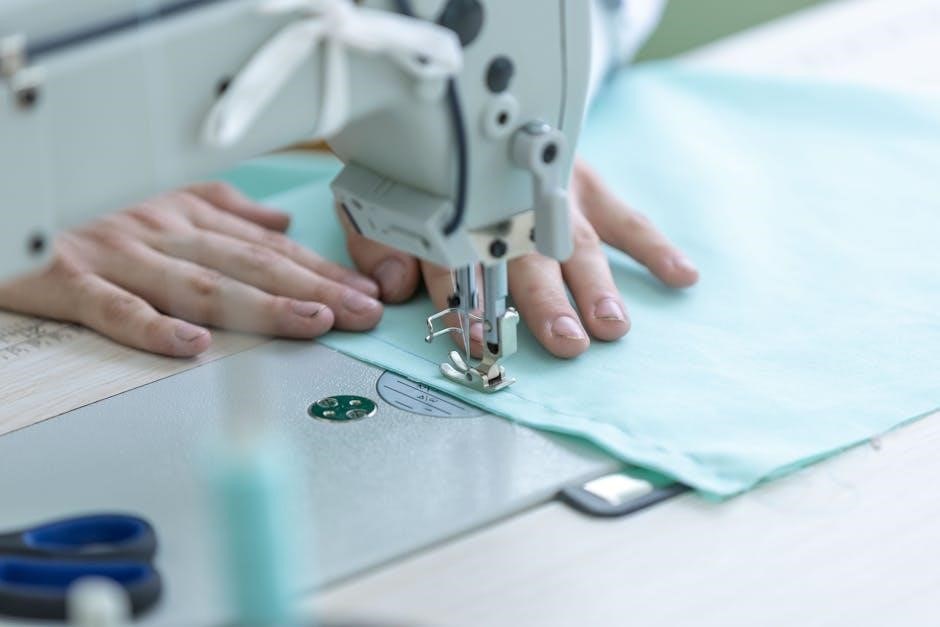
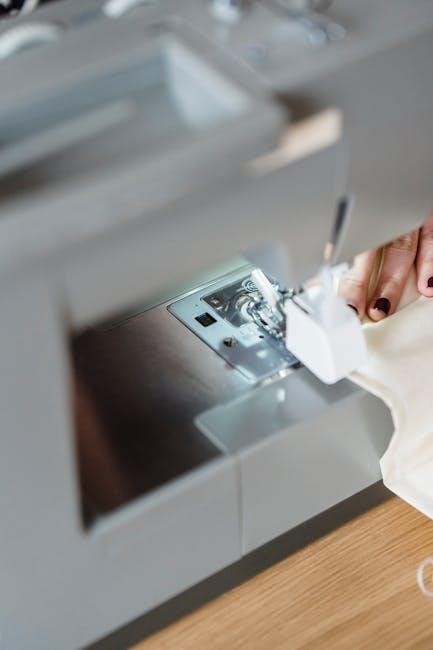
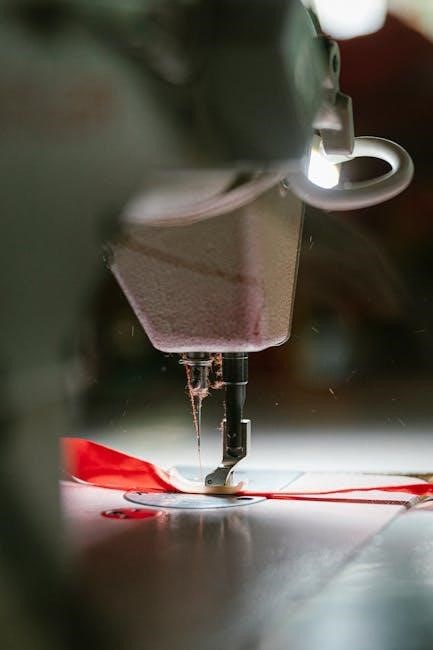
A seam guide is a tool designed to assist in maintaining a consistent distance between the edge of your fabric and the sewing machine needle. Essentially, it acts as a physical reference point, ensuring your seams are straight and of uniform width.
These guides come in various forms – magnetic, adhesive (like Post-it notes or tape), or even permanently engraved onto the machine bed. They help achieve professional results, particularly crucial for quilting precise blocks and garment sewing accurate fittings.
They are especially helpful for beginners learning to sew straight seams!
Why Use a Seam Guide?
Using a seam guide dramatically improves sewing accuracy and consistency. It ensures uniform, straight seams on every project, eliminating guesswork and reducing errors. Maintaining consistent seam allowances is vital for quilting, where precise block sizes are essential, and garment construction, for accurate fitting.
Seam guides build sewing confidence, especially for beginners, and offer a professional finish. They are useful when working with various seam allowances – 3/8″, 1/2″, 5/8″, or even directly at the throat plate edge – simplifying the process.
Types of Seam Guides
Seam guides come in diverse forms: magnetic for easy adjustment, adhesive like tape or Post-it notes for temporary use, engraved directly onto the machine bed, and built-in throat plate guides.
Magnetic Seam Guides
Magnetic seam guides offer a convenient and versatile solution for maintaining consistent seam allowances. These guides attach directly to the metal throat plate of your sewing machine, utilizing a strong magnetic grip to stay securely in place, even during faster sewing speeds.
They are easily adjustable, allowing you to quickly change the distance from the needle for different seam widths – some even flip for ¼”, 7/8”, or 1 ¼” measurements! Brands like Dritz are popular choices, offering affordability and effectiveness.
Installation and removal are simple, making them ideal for various projects.
Adhesive Seam Guides (Tape & Post-it Notes)
Adhesive seam guides provide a budget-friendly and accessible alternative to magnetic options. Utilizing double-sided tape or even Post-it Notes, you can create temporary seam lines directly on your sewing machine’s throat plate.
This DIY approach allows for customization and is particularly useful when a specific seam allowance isn’t readily available on your machine. While not as robust as magnetic guides, they offer precision for smaller projects.
They are easily repositionable, but may require more frequent reapplication during extended sewing sessions.
Engraved Seam Guides (Machine Bed)
Engraved seam guides offer a permanent, customized solution for consistent stitching. Some sewists utilize an engraver to carefully create seam lines directly onto the metal bed of their sewing machine.
This method provides readily available guides for frequently used seam allowances, such as 5/8″ or 3/8″, eliminating the need for attachments. However, it’s a permanent modification requiring precision and caution.
Once engraved, these lines become integral to the machine, offering a reliable reference point for accurate sewing.
Throat Plate Seam Guides (Built-in)
Built-in throat plate seam guides are a convenient feature found on many sewing machines. These guides, often lines or indentations, are directly incorporated into the machine’s throat plate.
They provide a readily accessible reference for maintaining consistent seam allowances, like the standard 5/8″ or smaller measurements. Utilizing the edge of the throat plate itself also serves as a zero-seam guide.
This eliminates the need for additional attachments, offering a simple and effective solution for accurate stitching.
Features to Look for in a Seam Guide
Essential features include a strong magnetic grip for stability, clear measurement markings for accuracy, adjustability for varied seam allowances, and durable construction for longevity.
Strong Magnetic Grip
A robust magnetic grip is paramount for a reliable seam guide. It ensures the guide remains securely positioned on the sewing machine’s metal throat plate, preventing frustrating slippage during sewing, even at faster speeds.
Without a strong hold, accuracy suffers, and consistent seam allowances become difficult to achieve. Look for guides specifically designed with powerful magnets to maintain stability throughout your projects, whether quilting or garment construction. This feature is especially crucial for beginners building confidence.
Clear Measurement Markings
Precise and easily readable measurement markings are essential on any seam guide. Common markings include 3/8″, 1/2″, 5/8″ (industry standard), and 6/8″, allowing for quick adjustments to various seam allowance requirements.
Guides with clearly labeled lines eliminate guesswork and ensure accurate stitch placement. Some guides even allow utilizing the throat plate edge for a zero-distance seam. This clarity is particularly beneficial for beginners learning different seam widths and achieving professional results.
Adjustability
A key feature of a versatile seam guide is its adjustability. The ability to quickly reposition the guide is crucial for accommodating different seam allowances needed for various projects. Magnetic guides offer simple sliding adjustments, while some allow flipping for common measurements like 1/4″, 7/8″, or 1 1/4″.
This flexibility streamlines the sewing process, eliminating the need for constant re-measurement and ensuring consistent seam widths across garments and quilts.
Durability
A durable seam guide withstands repeated use and maintains its accuracy over time. Look for guides constructed from robust materials capable of resisting wear and tear from frequent adjustments and sewing speeds. Strong magnets are essential for preventing slippage, ensuring consistent seam placement.
Engraved lines, if present, should remain clearly visible, and adhesive guides need reliable sticking power. Investing in a well-made guide saves frustration and ensures long-term sewing success.
Using a Magnetic Seam Guide
Magnetic seam guides easily attach to metal throat plates, offering quick installation and removal. Adjust the guide’s position to match your desired seam allowance for precise stitching!
Installation and Removal
Installing a magnetic seam guide is remarkably simple; just position it on the metal throat plate of your sewing machine. The strong magnet ensures it stays securely in place during sewing.
To remove the guide, gently lift it straight up – no tools are required! This ease of use makes switching between different seam allowances incredibly convenient.
These guides are designed for quick adjustments, allowing for seamless transitions between projects requiring varying seam widths, like quilting or garment construction.
Adjusting the Guide for Different Seam Allowances
Adjusting a seam guide is straightforward, allowing for versatility in your sewing projects. Simply reposition the magnetic guide along the throat plate to achieve your desired seam width.
Many guides feature clear markings for common allowances like 3/8″, 1/2″, and the industry-standard 5/8″. Flipping a ruler-style guide reveals additional measurements like 1 1/4″.
Precise adjustments are key for consistent results, whether you’re working on quilting blocks or garment construction, ensuring professional-looking seams every time.
Sewing with the Guide
Sewing with a seam guide is remarkably simple and enhances accuracy. Position your fabric alongside the guide, ensuring a consistent distance from the needle as you begin stitching.
The strong magnetic grip keeps the guide securely in place, even during faster sewing speeds, preventing slippage and maintaining a uniform seam allowance.
Focus on guiding the fabric; the seam guide does the work of keeping your stitches straight and evenly spaced, resulting in professional-quality results.
DIY Seam Guide Options
Creating your own seam guides is cost-effective! Options include engraving lines on your machine bed, utilizing tape for temporary lines, or employing Post-it notes for precision.
Creating Seam Lines with an Engraver
For a permanent DIY solution, some sewists utilize an engraver to carefully etch seam lines directly onto the metal bed of their sewing machine. This method provides readily available guides without relying on external tools.
However, proceed with caution! Ensure the engraver is appropriate for metal and practice on an inconspicuous area first. Creating lines for common seam allowances – 3/8″, 1/2″, 5/8″, and 3/4″ – offers versatility. Remember, this is a permanent modification, so plan carefully before engraving!
Using Tape as a Temporary Guide
A quick and inexpensive method involves utilizing tape – particularly double-sided tape – as a temporary seam guide. Apply the tape to the throat plate of your sewing machine, creating a straight edge to guide your fabric.
This is ideal for projects requiring less frequent seam allowance changes or for testing different seam widths. While not as durable as other options, tape provides a readily available solution, especially when combined with Post-it notes for precision!
Utilizing Post-it Notes for Precision
Post-it notes offer a versatile and easily adjustable temporary seam guide solution. Their adhesive allows for quick placement on the sewing machine’s throat plate, creating a clear visual line for fabric alignment.
You can layer Post-it notes to achieve different seam allowance widths, offering flexibility for various projects. This method is particularly useful alongside tape or as an alternative when a magnetic guide isn’t available, ensuring accurate stitching!
Seam Allowance Measurements & Common Uses
Common seam allowances include 3/8″, 1/2″, 5/8″ (industry standard), and 3/4″. Guides help achieve these, with some utilizing the throat plate’s edge for zero allowance.
3/8″ Seam Allowance
A 3/8″ seam allowance is frequently used in garment construction, particularly in older patterns or when a slightly narrower seam is desired. Utilizing a seam guide precisely marked at 3/8″ ensures consistent results, crucial for accurate fitting and a professional finish.
Many seam guides, like those from Dritz, feature clear markings for this measurement, allowing for easy adjustment and fabric alignment. This allowance offers a balance between seam strength and fabric usage, making it versatile for various projects.
1/2″ Seam Allowance
A 1/2″ seam allowance provides a robust and durable seam, often favored in projects requiring extra strength, like bags or items undergoing frequent use. Employing a seam guide accurately positioned at the 1/2″ mark is essential for maintaining consistent seam widths throughout your project.
Seam guides, including magnetic options, simplify achieving this precise measurement. This allowance also offers a bit more forgiveness during sewing, making it suitable for various fabric weights and skill levels.
5/8″ Seam Allowance (Industry Standard)
The 5/8″ seam allowance is widely recognized as the industry standard, particularly in commercial garment construction. Utilizing a seam guide set to this measurement ensures compatibility with patterns designed for this allowance, promoting accurate fitting and professional results.
Magnetic seam guides are incredibly helpful for consistently hitting this mark. Many sewing machine throat plates feature a 5/8″ guide already engraved, but additional guides offer enhanced precision and versatility for diverse projects.
3/4″ (6/8″) Seam Allowance
A 3/4″ (or 6/8″) seam allowance is less common than the 5/8″ standard, but it’s utilized in specific pattern designs and construction techniques, often providing added fabric for durability or fullness. A reliable seam guide is crucial for maintaining accuracy with this wider seam.
Many adjustable magnetic seam guides allow you to easily set the guide to 6/8″, ensuring consistent stitching. Some guides even feature markings for both 5/8″ and 6/8″ for quick switching between projects.
Seam Allowance Directly at the Throat Plate Edge
Sewing directly at the throat plate edge provides a zero seam allowance, ideal for techniques like attaching binding or creating very narrow hems. This method relies on precise fabric alignment against the machine’s metal surface.
While not always requiring a dedicated seam guide, utilizing the edge as a reference point demands careful attention. Some quilters and garment sewers prefer this technique for specific finishing details, ensuring a clean and professional result.
Seam Guides for Beginners
Seam guides are perfect for new sewers, dramatically improving straight stitch accuracy and consistent seam widths. They build confidence and deliver professional results!
Simple designs, like those from SINGER, are effective and easy to use, fostering a positive learning experience.
Improving Straight Stitch Accuracy
Seam guides are exceptionally helpful for beginners struggling with straight stitching. They act as a physical reference, preventing fabric drift and ensuring the needle consistently follows a straight path.
By providing a clear visual boundary, seam guides minimize the tendency to veer off course, resulting in neater, more professional-looking seams. Consistent seam widths are also achieved, eliminating wavy or uneven edges.
Even experienced sewers can benefit from using a seam guide for projects requiring precise lines, like quilting or garment construction.
Maintaining Consistent Seam Widths
Seam guides excel at ensuring uniform seam allowances throughout a project. Whether using a 3/8″, 1/2″, or the industry-standard 5/8″ allowance, a guide keeps the fabric edge aligned for consistent results.
This is crucial for garment construction, where accurate seam widths impact fit, and quilting, where precision is key for block alignment. Magnetic and engraved guides offer reliable, repeatable measurements.
Eliminating variations in seam width creates a polished, professional finish.
Building Sewing Confidence
Seam guides are particularly beneficial for beginner sewers, fostering confidence with each straight stitch. By providing a visual reference, they eliminate guesswork and reduce errors, leading to more successful projects.
Knowing your fabric is consistently positioned builds skill and encourages experimentation. Simple designs, like those from Everything Mary, make them accessible and easy to use.
Overcoming initial sewing anxieties is easier with the support of a reliable seam guide.

Seam Guide Alternatives
Alternatives include using the throat plate edge, engraving seam lines directly onto the machine bed, or even employing “liquid stitch” for no-sew solutions!
Liquid Stitch (No-Sew Seam Solution)
Liquid Stitch, often described as a “sewing machine in a bottle,” presents a fascinating alternative to traditional stitching. This adhesive creates a permanent, washable, and dry-cleanable bond for appliques, quilts, hems, and seams – eliminating the need for a needle and thread altogether.
While not a direct replacement for a seam guide’s precision in fabric manipulation, it offers a unique solution for quick fixes or projects where sewing isn’t feasible. It’s non-toxic and available in convenient sizes, like 2 fluid ounces.
Recommended Seam Guide Brands
Dritz, Everything Mary, and SINGER offer reliable seam guides. Dritz provides magnetic options, while Everything Mary features collapsible cases with included guides, and SINGER bundles tools.
Dritz Seam Guide
Dritz Seam Guides are a popular and affordable choice for sewists of all levels. These guides boast a strong magnetic grip, ensuring they stay securely positioned on your sewing machine’s metal throat plate during use, even at faster sewing speeds.
A key feature is their adjustability; easily flip the ruler for common seam allowances like 1/4″, 7/8″, or 1 1/4″. This versatility makes them ideal for quilting and garment construction. They are praised for their simple yet effective design, perfect for beginners learning straight stitch accuracy.
Everything Mary Seam Guide
Everything Mary Seam Guides offer a convenient solution for maintaining consistent seam widths. These guides are known for being affordable and easy to use, making them a great option for both novice and experienced sewers.
They feature a simple, yet effective design, providing a reliable guide for straight seams. Often available as part of a larger sewing tool bundle, like those found at JOANN, they are a practical addition to any sewing kit. Their collapsible rolling case is also a plus!
SINGER Seam Guide Tools
SINGER offers a range of seam guide tools designed to enhance sewing accuracy and efficiency. Available in bundles with other essential sewing supplies at stores like JOANN, these tools cater to modern makers.
They provide a straightforward method for achieving professional-looking seams, particularly useful for garment construction and quilting projects. SINGER’s seam guides contribute to consistent seam allowances, improving overall project quality and simplifying the sewing process for all skill levels.
Troubleshooting Seam Guide Issues
Common problems include guide slippage or inaccurate seam allowances. Ensure a strong magnetic grip and proper adjustment; consider alternatives like tape if issues persist!
Guide Slipping or Moving
A slipping seam guide is frustrating, but often easily resolved! First, verify your sewing machine’s throat plate is clean and free of debris, as this impacts magnetic adhesion. Ensure the guide is positioned on a flat, metal surface – some machines have non-magnetic areas.
If using a magnetic guide, a weaker magnet might be the culprit. Consider a higher-quality guide with a stronger grip. For temporary fixes, double-sided tape or even a wide rubber band can provide extra security, though these aren’t long-term solutions.
Inaccurate Seam Allowances
Inconsistent seam allowances can ruin a project! Double-check your seam guide’s markings are accurate and haven’t shifted during use. Verify the guide is correctly aligned with the desired seam allowance on your machine’s throat plate – 5/8″ is the industry standard.
If using a DIY guide, ensure your engraved lines or tape placement are precise. Remember, sewing directly at the throat plate edge creates a zero seam allowance. Recalibrate and test on scrap fabric before starting your actual project.
Seam Guides for Quilting
Precise quilt blocks and consistent patchwork rely on accurate seam allowances! Magnetic seam guides excel here, ensuring uniformity and simplifying the creation of beautiful quilts.
They are great for quilting and garment sewing!
Achieving Precise Quilt Blocks
Quilting demands accuracy, and seam guides are essential for achieving perfectly pieced blocks. Consistent seam allowances, facilitated by guides like those from Dritz or Everything Mary, prevent blocks from becoming skewed or mismatched.
Whether using a magnetic guide or a DIY solution like engraved lines, maintaining a consistent distance from the needle is key. This precision translates to quilt blocks that fit together seamlessly, resulting in a polished and professional final product.
A 5/8″ seam allowance is an industry standard!
Consistent Seam Allowances in Patchwork
Patchwork relies heavily on precise seam allowances; even slight variations can cause blocks to misalign. Seam guides, whether magnetic or created with tape or an engraver, ensure uniformity across all pieces.
Maintaining a consistent 1/4″, 3/8″, or 5/8″ seam – the industry standard – is crucial for successful patchwork. Guides help achieve this, preventing puckering or uneven edges. Utilizing a guide simplifies the process, leading to beautifully constructed and accurately fitted patchwork projects.
Seam Guides for Garment Sewing
Seam guides deliver professional-looking seams and accurate fitting in garment construction. They ensure consistent seam allowances, vital for well-draped and properly sized clothing.
Magnetic guides simplify achieving these results, enhancing the overall quality of your finished garments.
Professional-Looking Seams
Achieving consistently neat and even seams is a hallmark of professional garment construction, and seam guides are instrumental in this process. They eliminate guesswork, ensuring fabric edges remain parallel to the needle, resulting in a polished finish.
Whether utilizing a magnetic guide, an engraved line, or even a temporary tape guide, the precision offered dramatically elevates the appearance of your projects. Consistent seam widths contribute to a more refined and durable garment, mirroring the quality of store-bought items.
These tools truly help elevate your sewing!
Accurate Fitting
Precise seam allowances are paramount for achieving a well-fitted garment, and seam guides are essential for maintaining this accuracy. Even slight variations in seam width can significantly impact the final fit, leading to pulling, bunching, or an overall awkward silhouette.
By consistently guiding the fabric, seam guides ensure each section is sewn with the intended allowance, crucial for pattern matching and achieving a professional, tailored look. This is especially important when altering patterns or working with complex designs.
A good fit starts with accurate seams!
Caring for Your Seam Guide
Regular cleaning and proper storage will extend your seam guide’s life. Wipe away fabric lint and store it safely to maintain its magnetic grip and accuracy.
Cleaning and Maintenance
Maintaining your seam guide is simple yet crucial for optimal performance. Regularly wipe the surface with a soft, dry cloth to remove accumulated lint, thread fragments, and fabric fibers. For magnetic guides, ensure the metal surface of both the guide and your machine’s throat plate are clean for a strong hold.
Avoid using harsh chemicals or abrasive cleaners, as these can damage the guide’s finish or weaken the magnetic grip. A gentle brush can help dislodge debris from engraved lines. Proper cleaning ensures accurate seam allowances and prevents slippage during sewing projects.
Storage
Proper storage extends the life of your seam guide and keeps it readily available. When not in use, store magnetic seam guides away from strong magnetic fields that could diminish their strength. A dedicated sewing box, drawer organizer, or tool caddy are ideal locations.
Protect adhesive guides from dust and debris by keeping them in their original packaging or a resealable bag. This prevents the adhesive from losing its tackiness; Careful storage ensures your seam guide remains a reliable companion for all your sewing endeavors.