
Pinocchio PDF: A Comprehensive Guide (Updated 12/18/2025)
Today, December 18th, 2025, accessing Pinocchio as a free PDF ebook is remarkably easy, with options from Z-Library and Standard Ebooks readily available for immediate download.
Numerous websites offer digitized versions, including Project Gutenberg and the Internet Archive, providing access to this classic tale in various formats like EPUB, FB2, DOC, and TXT.
What is Pinocchio and Why the Interest in a PDF Version?
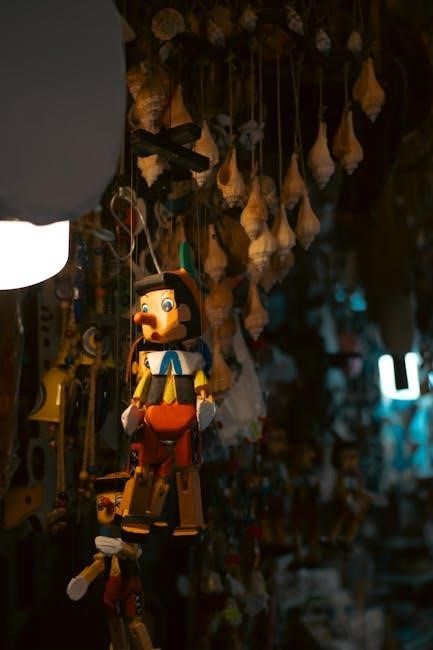
Pinocchio, penned by Carlo Collodi, is a beloved 1883 Italian children’s novel recounting the adventures of a wooden puppet striving to become a real boy. The story, rich with moral lessons, follows Pinocchio’s journey filled with mischievousness, temptation, and ultimately, redemption.
The surge in interest for a Pinocchio PDF stems from the desire for convenient, portable access to this timeless tale. PDF format allows readers to enjoy the story on various devices – smartphones, tablets, computers – without requiring an internet connection after the initial download.
Furthermore, the availability of free digital copies, particularly through platforms like Z-Library, Standard Ebooks, and Project Gutenberg, makes the story accessible to a wider audience. The ease of sharing and archiving ebooks also contributes to the enduring popularity of seeking Pinocchio in PDF form.
The Original Story of Pinocchio: A Brief Overview
The Adventures of Pinocchio, originally published as Le avventure di Pinocchio, centers around a wooden puppet carved by Geppetto, a poor woodcarver. Brought to life by a magical fairy, Pinocchio embarks on a series of misadventures as he attempts to prove himself worthy of becoming a real boy.
Throughout his journey, Pinocchio faces numerous temptations and falls prey to deceitful characters like the Fox and the Cat. He repeatedly disobeys the Blue Fairy, leading to comical yet cautionary consequences, including his nose growing with each lie.
Ultimately, Pinocchio learns the importance of honesty, bravery, and selflessness. He rescues Geppetto from the belly of a giant shark, demonstrating genuine compassion and earning his transformation into a real boy. Finding a Pinocchio PDF allows readers to easily revisit this classic narrative and its enduring moral lessons.
Carlo Collodi: The Author Behind the Tale
Carlo Collodi, born Carlo Lorenzini in Florence, Italy, was a writer and journalist known primarily for creating the beloved character of Pinocchio. He began his literary career writing political satire and children’s stories, but it was The Adventures of Pinocchio that cemented his legacy.
Initially published in installments between 1881 and 1883, the story wasn’t immediately a success. Collodi’s work reflected the social and political climate of 19th-century Italy, subtly critiquing societal norms through the puppet’s journey.
His most successful book, Pinocchio, was written for children, and has become a cornerstone of children’s literature. Today, accessing a Pinocchio PDF allows readers to appreciate Collodi’s masterful storytelling and the timeless themes woven throughout his narrative, ensuring his work continues to inspire generations.
Finding Pinocchio PDFs Online: A Landscape of Options
The digital realm offers a diverse landscape for locating Pinocchio PDFs. Several platforms specialize in providing access to classic literature in digital formats. Z-Library, for instance, hosts a version of Pinocchio available for free download as a PDF or for online reading.
However, navigating these options requires caution, as the quality and legality of downloads can vary. Always prioritize reputable sources to ensure a safe and legitimate Pinocchio PDF experience.

Z-Library and Pinocchio: Availability and Access
Z-Library currently features a Pinocchio PDF version attributed to Winshluss (Vincent Paronnaud), offering a readily accessible digital copy of the beloved tale. Users can directly download the 180-page book as a PDF file or opt to read it online without a download, providing convenient access for various preferences.
The platform’s interface allows for straightforward navigation to locate the Pinocchio ebook. While Z-Library’s availability can fluctuate due to legal challenges, it remains a prominent source for finding digitized books, including classic literature like Pinocchio.
It’s important to note that accessing content from such platforms may carry legal implications depending on your jurisdiction, so users should be aware of copyright laws and potential risks associated with downloading from unofficial sources.
Standard Ebooks: A Reliable Source for Pinocchio PDFs
Standard Ebooks provides a dependable and legally sound avenue for obtaining a free digital copy of The Adventures of Pinocchio. They offer a meticulously crafted EPUB edition, ensuring a high-quality reading experience optimized for ebook readers.
This version isn’t simply a scanned image; it’s been digitized and proofread by dedicated volunteers, resulting in a clean and accurate text. Standard Ebooks prioritizes accessibility and readability, making their Pinocchio PDF (and other formats) ideal for extended reading sessions.
The site’s commitment to providing public domain works in polished formats distinguishes it as a trustworthy resource. Downloading is straightforward, and the ebook is available for free, offering a guilt-free way to enjoy Collodi’s timeless story.
Royallib.com: Pinocchio in Multiple Formats
This accessibility makes Royallib.com a valuable resource for those who may not prefer the EPUB format. The site provides a straightforward interface for browsing and downloading, allowing for quick and easy access to the classic narrative. It’s a convenient option for readers seeking flexibility in how they experience Pinocchio.
While the site offers multiple options, it’s important to verify the file’s integrity after download. Royallib.com provides a broad selection, making it a go-to destination for free Italian literature.
Legal Considerations When Downloading Pinocchio PDFs

When seeking Pinocchio PDFs online, understanding the legal landscape is crucial. Fortunately, The Adventures of Pinocchio is largely in the public domain, meaning it’s free to download and distribute in many regions. However, specific translations or illustrations may still be under copyright.
Downloading from reputable sources like Project Gutenberg, Internet Archive, and Standard Ebooks minimizes legal risks, as they primarily offer public domain content. Conversely, unverified websites may host copyrighted material illegally.
Always exercise caution and prioritize legal downloads. Supporting legitimate sources ensures authors and publishers are compensated for their work. While finding a free copy is tempting, respecting copyright laws is essential. Be mindful of the source and its licensing terms before downloading any Pinocchio PDF.
Copyright Status of Pinocchio: Public Domain or Not?
Determining the copyright status of Pinocchio PDFs requires nuance. Carlo Collodi’s original Italian text, Le avventure di Pinocchio, published in 1883, is definitively in the public domain globally. This means the core story itself is free for anyone to use, copy, and distribute.
However, the copyright situation becomes more complex with translations. While the original work is open, specific English translations – and any accompanying illustrations – may still be protected by copyright, depending on their publication date.
Therefore, a free Pinocchio PDF based directly on the original Italian text is generally legal to download. But, be cautious with newer translations or editions featuring unique artwork, as they might require permission from the copyright holder for legal distribution and download.
Risks Associated with Downloading from Unverified Sources
Downloading Pinocchio PDFs from unverified websites carries significant risks. These sources often lack robust security measures, making your device vulnerable to malware, viruses, and spyware disguised as legitimate ebook files. Such malicious software can compromise your personal data and system integrity.
Furthermore, these sites frequently offer illegally distributed content, potentially exposing you to legal repercussions. The quality of the PDF itself can also be questionable – poorly scanned copies with errors, missing pages, or unreadable text are common.
Prioritize reputable platforms like Project Gutenberg, Internet Archive, or Standard Ebooks for safe and legal downloads. Always use a reliable antivirus program and exercise caution when clicking links or downloading files from unfamiliar websites offering free content.

Pinocchio PDF Formats: EPUB, FB2, DOC, RTF, TXT, and More

Pinocchio is readily available in a diverse range of PDF and ebook formats to suit various reading preferences and devices. EPUB is a popular, reflowable format ideal for ebook readers, adjusting text to screen size. FB2 is another favored choice, particularly among dedicated ebook reader users.
More traditional formats like DOC, RTF, and TXT offer compatibility across a wider range of devices, though they may lack the advanced formatting features of EPUB or FB2. PDF itself provides a fixed-layout experience, preserving the original formatting of the text.
Understanding EPUB Format for Pinocchio eBooks
EPUB is a leading digital publication standard, exceptionally well-suited for enjoying Pinocchio as an ebook; Its key strength lies in its reflowable nature; the text dynamically adjusts to fit any screen size, enhancing readability on various devices – from Kindle (after conversion) to tablets and smartphones.
Standard Ebooks provides a free EPUB edition of The Adventures of Pinocchio, meticulously digitized and proofread for a superior reading experience. This format supports features like adjustable font sizes, margins, and themes, allowing for personalized customization.
Unlike fixed-layout formats like PDF, EPUB prioritizes text flow, making it ideal for extended reading sessions. It’s a versatile and widely supported format, ensuring broad compatibility and a comfortable reading experience for Pinocchio enthusiasts.
FB2 Format: A Popular Choice for eBook Readers
FB2 (FictionBook2) is a widely embraced ebook format, particularly popular among readers who prefer a text-focused experience when delving into stories like Pinocchio. Royallib.com notably offers Carlo Collodi’s masterpiece in FB2, alongside other formats like DOC, RTF, and TXT.
FB2 distinguishes itself through its simplicity and efficient storage. It primarily concentrates on the text content, minimizing file size without sacrificing readability. This makes it an excellent choice for devices with limited storage capacity or for readers who prioritize quick downloads.
While not as universally supported as EPUB, FB2 enjoys strong compatibility with numerous ebook readers and reading applications. It’s a reliable and convenient option for accessing Pinocchio, offering a clean and distraction-free reading environment.
DOC, RTF, and TXT: Compatibility and Limitations
DOC (Microsoft Word), RTF (Rich Text Format), and TXT (Plain Text) offer broad compatibility but present limitations when seeking a refined Pinocchio PDF reading experience. Royallib.com lists Pinocchio in these formats, catering to users with diverse software access.
TXT files, being plain text, lack formatting – ideal for basic reading but stripping away stylistic elements. RTF retains some formatting, offering a step up, while DOC provides the most formatting control, though rendering can vary across different word processors.

These formats often require specific software for optimal viewing and may not reflow text effectively on smaller ebook readers. While convenient for quick access and editing, they generally don’t match the dedicated ebook formats like EPUB or FB2 in terms of readability and device compatibility.
Where to Download Pinocchio PDFs Legally and for Free
Fortunately, several reputable sources offer Pinocchio PDFs legally and without cost. Project Gutenberg stands out, providing public domain ebooks, including Carlo Collodi’s classic, for free download in various formats.
The Internet Archive is another excellent resource, hosting digitized versions of Pinocchio, allowing access to historical editions. Additionally, numerous websites specialize in free Italian literature, offering Pinocchio in English translations.
Standard Ebooks provides meticulously proofread and formatted EPUB versions, ensuring a high-quality reading experience. Remember to verify the source’s legitimacy to avoid copyright infringement and potential malware. These platforms prioritize legal access to timeless literature like Pinocchio.
Project Gutenberg: A Source for Public Domain eBooks
Project Gutenberg is a cornerstone for accessing classic literature, including numerous versions of Pinocchio in PDF, EPUB, and other formats. As a volunteer-driven initiative, they meticulously digitize and proofread ebooks that have entered the public domain.
This means you can legally download and read The Adventures of Pinocchio by Carlo Collodi completely free of charge. The website offers various ebook options, catering to different reading devices and preferences. You can easily read or download the text directly from their website.
Project Gutenberg ensures accessibility to cultural treasures like Pinocchio, promoting literacy and preserving literary heritage. Their commitment to quality and legality makes them a trusted source for free ebooks.
Internet Archive: Accessing Digitized Versions of Pinocchio
The Internet Archive serves as a vast digital library, offering access to a wealth of digitized materials, including multiple versions of Pinocchio in PDF and other formats. It’s a fantastic resource for locating older editions and translations of Carlo Collodi’s classic tale.
Users can read or download these digitized versions for free, contributing to the preservation and accessibility of literature. The Internet Archive often hosts scans of original books, providing a unique glimpse into the history of the publication.
While the quality of scans may vary, it remains a valuable platform for discovering different interpretations and editions of Pinocchio. It’s a great alternative for those seeking a wider range of options beyond Project Gutenberg, offering a diverse collection of ebooks.
Free Italian Literature Websites Offering Pinocchio
Several websites specialize in providing free access to Italian literature, and many feature Pinocchio in various digital formats, including PDF, ePub, Mobi, Fb2, Azw3, and Kindle. These platforms often cater to readers interested in experiencing the story in its original language or in English translation.
These resources are invaluable for those seeking a broader selection of editions and translations than typically found on mainstream ebook platforms. They frequently offer texts that have been digitized and made available to the public, promoting access to Italian cultural heritage.
Exploring these sites can uncover unique versions of Pinocchio, potentially including different illustrations or annotations. Remember to verify the legitimacy of the source and respect copyright considerations when downloading content.
Pinocchio eBooks for Kindle and Other Devices
Fortunately, Pinocchio is widely available as an eBook compatible with Kindle and other popular reading devices; Many websites offer direct downloads in formats easily converted for Kindle, such as EPUB or MOBI. Several sources provide the story in PDF format, which can then be converted using readily available online tools.
Readers can enjoy Carlo Collodi’s classic tale on a variety of platforms, including Kobo, Nook, and Apple Books, in addition to Kindle. The accessibility of Pinocchio across these devices ensures a convenient reading experience for a broad audience.
Finding a suitable version often involves a quick search for “Pinocchio Kindle” or “Pinocchio eBook,” leading to numerous options for purchase or free download from reputable sources like Project Gutenberg.
Converting Pinocchio PDFs to Kindle Format
While Kindle devices natively support PDF files, converting them often enhances the reading experience. PDFs can sometimes display poorly on smaller screens due to fixed formatting. Fortunately, several methods exist to convert Pinocchio PDFs into Kindle-compatible formats like MOBI or AZW3.
Utilizing online conversion tools is a straightforward option; many websites offer free conversion services. Alternatively, software like Calibre provides robust conversion capabilities and allows for customization of eBook settings. This includes adjusting font sizes, margins, and metadata.
After conversion, simply transfer the file to your Kindle via USB or Send-to-Kindle email service. This ensures optimal readability and allows you to enjoy Pinocchio on your device with a reflowable text layout.
Reading Pinocchio on Different eBook Readers
Enjoying a Pinocchio PDF isn’t limited to Kindle! Various eBook readers support different formats, impacting the reading experience. EPUB is widely compatible with devices like Kobo, Nook, and many Android-based readers, offering reflowable text for comfortable reading.
FB2 format is popular among dedicated eBook readers, providing excellent formatting and support for metadata. Devices supporting DOC, RTF, or TXT files can also display Pinocchio, though formatting may be basic.
Regardless of the reader, ensure the file is properly transferred – usually via USB or a dedicated syncing service. Some readers allow direct download from online libraries. Experimenting with font sizes and screen brightness optimizes readability for each device, enhancing your journey with Pinocchio.

The Adventures of Pinocchio: Key Themes and Motifs
Pinocchio’s enduring appeal stems from its rich exploration of universal themes. Central to the narrative is the journey from boyhood to maturity, symbolized by Pinocchio’s transformation into a real boy. This transformation isn’t automatic; it requires moral growth, obedience, and selflessness.
The motif of temptation and consequence is prominent, as Pinocchio repeatedly succumbs to vice, facing immediate repercussions. Disobedience, lying, and idleness lead to hardship, highlighting the importance of virtuous behavior.
Furthermore, the story delves into themes of familial love and redemption. Geppetto’s unwavering affection for Pinocchio, even in his flawed state, underscores the power of unconditional love; Ultimately, Pinocchio’s story, readily available as a PDF, is a powerful moral allegory.
Pinocchio as a Moral Allegory
Pinocchio functions profoundly as a moral allegory, using fantastical elements to illustrate ethical principles. The wooden puppet’s journey represents the human struggle between good and evil, temptation and virtue. Each misadventure – the puppet show, the Field of Wonders, the Isle of the Toy – embodies a specific moral failing and its consequences.

Pinocchio’s lengthening nose serves as a visible manifestation of dishonesty, a potent symbol of the repercussions of lying. His transformation into a donkey highlights the dangers of succumbing to idleness and vice.
Accessing the story as a PDF doesn’t diminish its allegorical power; rather, it allows wider access to these timeless lessons. Ultimately, Pinocchio’s redemption through selfless acts demonstrates the path to moral growth and true humanity, making it a compelling read for all ages.
The Enduring Appeal of Pinocchio Across Generations

Pinocchio’s lasting popularity stems from its universal themes of self-discovery, responsibility, and the desire to be “real.” The story resonates with each generation, offering a compelling narrative about navigating the complexities of life and the importance of moral choices.
The accessibility of Pinocchio as a PDF ebook further contributes to its continued relevance. Digital formats like EPUB and FB2, easily downloaded from sources like Standard Ebooks and Project Gutenberg, ensure the tale reaches new audiences globally.
Whether through Carlo Collodi’s original text or Disney’s adaptation, the core message endures. The convenience of a PDF allows readers to revisit this classic tale, fostering a connection across time and reinforcing its timeless wisdom.
Pinocchio vs. Disney’s Adaptation: Differences and Similarities
While Disney’s 1940 Pinocchio is beloved, it significantly diverges from Carlo Collodi’s original. The PDF ebook versions of Collodi’s tale reveal a darker, more morally complex narrative than the sanitized Disney version.
Collodi’s Pinocchio faces harsher consequences for his misdeeds, and the story includes several subplots absent in the film. Disney streamlines the plot, emphasizing heartwarming moments and a clear moral compass. Both versions, however, center on a wooden puppet’s journey to become a real boy.
Accessing both the original Pinocchio PDF and understanding Disney’s adaptation provides a richer appreciation of the story’s evolution. The ebook format allows for easy comparison, highlighting the creative liberties taken and the enduring power of the core narrative.
The Impact of Disney on the Popular Perception of Pinocchio
Disney’s animated Pinocchio profoundly shaped how generations perceive the story, often overshadowing Carlo Collodi’s original, darker narrative. Many individuals’ first encounter with Pinocchio is through the 1940 film, influencing their understanding of the characters and themes.
Downloading a Pinocchio PDF of Collodi’s original work reveals significant differences. The Disney version softens the consequences of Pinocchio’s actions and emphasizes a more sentimental journey. This has led to a popular perception of Pinocchio as a purely innocent character, a contrast to Collodi’s more flawed protagonist.
The widespread availability of the Disney film, coupled with its iconic imagery, cemented its place in popular culture. Accessing the original ebook allows readers to rediscover the tale’s complexities and appreciate Collodi’s original vision, challenging the Disney-dominated narrative.
Exploring Other Adaptations of the Pinocchio Story
Beyond Disney’s iconic rendition, numerous adaptations of Pinocchio exist, offering diverse interpretations of Collodi’s tale. Finding these variations as PDF ebooks allows for comparative analysis, revealing how the story evolves across different mediums.
While Disney’s version is widely known, exploring other adaptations – including live-action films, theatrical productions, and even modern retellings – enriches understanding of the story’s enduring themes. Many are available for free download from sites like the Internet Archive, offering access to lesser-known versions.
Comparing these adaptations to a Pinocchio PDF of the original text highlights the creative liberties taken and the cultural influences shaping each interpretation. These explorations demonstrate the story’s adaptability and continued relevance, proving its power to resonate with audiences across generations and formats.